The saga of learning a new craft
Update: I’m now selling freeze peaches at my Etsy store: https://www.etsy.com/shop/Rillion
I haven’t been writing much lately, I know. That’s due to a lot of factors, but one of them is something I have the opportunity to now write about and show you.
I’ve been learning how to make things with epoxy resin. Epoxy resin is the conclusion I reached after doing a lot of thinking about how to depict concepts as physical objects, objects that you can wear– also called “jewelry.” I’m a big fan of “Surly” Amy Roth and her Surlyramics, and have a couple myself. She makes a variety of jewelry, mostly necklace pendants, which depict skeptical, atheist, and scientific messages in ceramics. They’re really popular because they’re aesthetically nice-looking, affordable, and people love to have ways to promote beliefs they find important aside from slapping them on a t-shirt.
There’s a theory I have about tattoos. There are three major components which a good, successful tattoo needs to have:
- Placement
- Artistry
- Meaning
If it’s lacking in any of these, it will suffer. A really nicely implemented, meaningful tattoo will suffer if it’s in the wrong place. A well-placed and meaningful tattoo will suffer if it’s ugly. A well-placed, beautiful tattoo will seem pointless if it has absolutely no meaning to the person wearing it– or worse, a meaning they later reject.
With jewelry it’s a little different, because the stakes are so much lower. There’s much less of an investment to putting something around your neck for a day as opposed to etching it on your skin forever. But these factors are still important to varying degrees with different people, and the “meaning” aspect can refer to the actual message the jewelry is sending in addition to the normal factors of who gave it to you, the occasion on which it was given/purchased, its age, etc., none of which will be immediately obvious to the people who see it. So why not try to make jewelry which is visibly meaningful?
That was the sort of mental path I was following while thinking about how to create a freeze peach.
I’m not entirely sure who came up with the concept of “freeze peach” as a mockery of the misinterpretation of free speech, but I think it might have been Stephanie Zvan. If you’re not familiar with the concept, it might help to read a post I wrote about it or this one by Adam Lee.
Basically, “freeze peach” is not mocking the idea of free speech, but rather the invocation of the concept by people with a fuzzy (har) understanding of what it means. People who complain that Phil Robertson being suspended (for about 30 seconds, as it turned out) from Duck Dynasty was a violation of his freedom of speech. People who think sexual harassment policies at conventions, private venues, violate freedom of speech. People who think that if you as an individual don’t feel the urge to pay attention to what the have to say and take action to avoid seeing it, such as blocking them on Facebook or Twitter– that that’s you somehow failing to respect their freedom of speech.
It’s important to make the distinction between “freeze peach” and actual free speech because there are very real opponents of free speech out there, people who think that government entities are justified in preventing certain kinds of expression, and they should not be confused with some jackass yelling about free speech when he gets banned from an internet forum.
John Scalzi has also had some great things to say about the misconstrual of free speech.
So I was thinking…what would be the best way to make a block of ice that isn’t a block of ice? After a lot of research (aka reading everything I could find online about it), I determined that epoxy resin would be the way to go. Making things with epoxy resin involves careful measurement, patience, and a lot of wax paper (resin peels off it, whereas it might not peel off your kitchen table– at least not in a way you’d like) and hand-washing (yes, even if you wear latex gloves…which you should).
With the brand of resin I use, it involves carefully mixing the resin with an equal amount of hardener (a 1:1 ratio) which serves as the catalyst for the curing process, which takes about 24 hours. Your chief enemies of this process are cold and bubbles, the former of which can cause the latter. So I began pouring a bowl of hot water, placing the bottles of both resin and hardener in it, and letting them sit there for a little bit before beginning to measure and mix them. And then, when bubbles would inevitably still occasionally show up in something I was making, popping and/or chasing them out of the mold with a toothpick.
The mold? Oh yeah, the mold. Molds can be plastic or silicone, and I have both, but plastic is more difficult because you can’t push something out of it nearly as easily. I’ve made two bangle bracelets so far using a plastic mold, and on both occasions I actually sat down on the floor and pushed with my foot to try and get the thing out of there. With silicone it’s easy for the same reason that making ice using speciality silicone ice trays is sometimes difficult– it’s so pliable. Pliable enough to make water slosh out when you put the thing in the freezer, but hard resin objects pop out when you push on the back of the mold.
So if a freeze peach is a peach in an ice cube, you should be able to use a regular ice tray to make them, right? Well, not really. See, regular ice trays, even if they’re silicone, tend to make pretty large blocks of ice, and they’re not generally cubes. So I ended up ordering a cube-shaped silicone mold off Etsy, along with a drop-shaped mold for my other project, dragon drops.
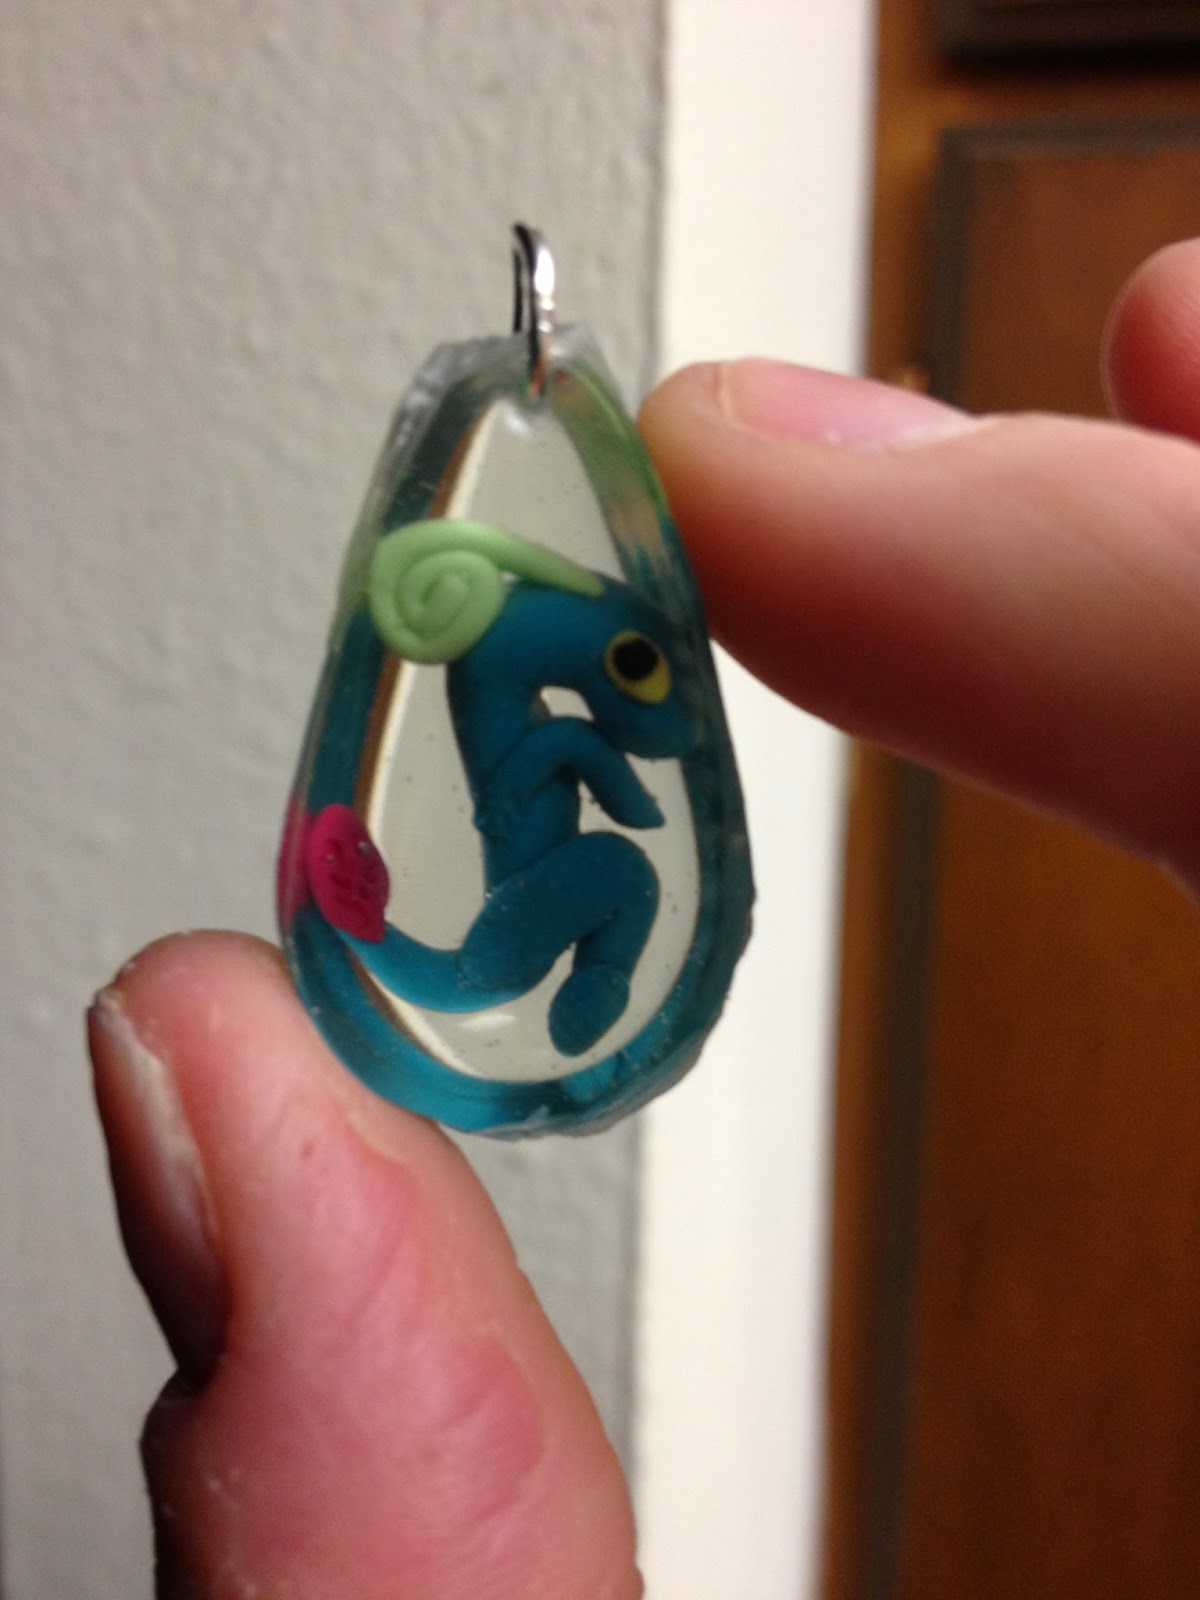
Yeah, a cheesy pun. But I like cheesy puns, and I love dragons, and I thought it would be fun to make little dragons which sit inside hardened clear drops of resin. And it has been fun– frustrating, challenging, and fun. See, you have to figure out what to make the dragons out of. I decided on clay, but what kind of clay? I don’t have a kiln, and I don’t want to bake clay in an oven, so what to use? I tried air-dry clay, but it was too light– the first freeze peach I made floated to the top of the mold when the resin was poured in. Oops.
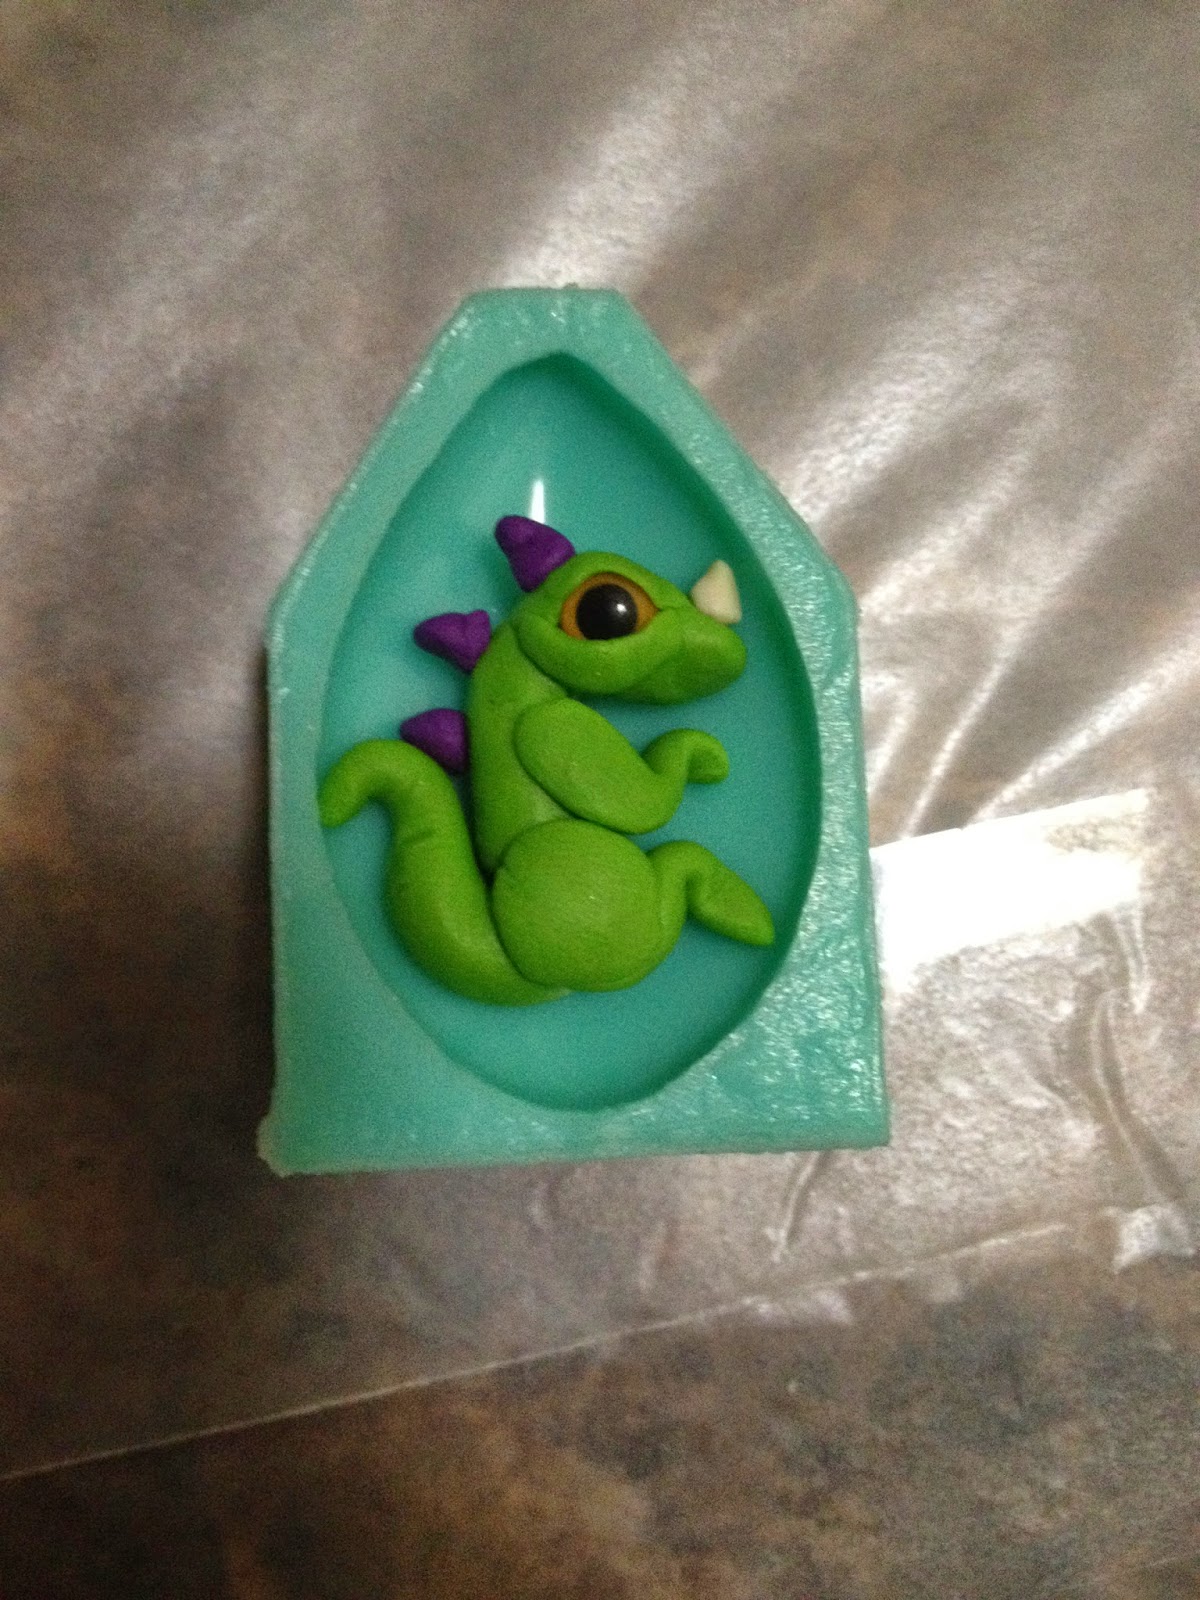
So I switched to modeling clay, which is awesome and affordable and comes in so many colors. Only clay eyes look strange, so I need to find some sort of plastic shiny eye to use. Now I have a small box full of different kinds of eyes, but the one I settled on for dragon drops is 6mm (tiny), yellow, and round. And each one has eyelids. Eyelids are so important!
And the mold for the dragon drops is shallow, so they have to be flat dragons, which is its own level of difficulty. In most cases the dragon hasn’t been flat enough to not disturb the surface of the resin when I pour it in, so the eye and sometimes the thigh of the dragon protrude a tiny bit. I’m currently trying to decide if that’s okay.
And I have other ideas. Oh, so many ideas.
But now it’s time for pictures. I’ll share a few here, and the rest are viewable on my Instagram account.
 |
| First attempt at a dragon drop, using a plastic mold. I can’t even say how difficult it was a poke a hole in it and get the jump ring in there. |
 |
| A more evolved dragon drop, with plastic eye, sitting in the mold waiting for resin. |
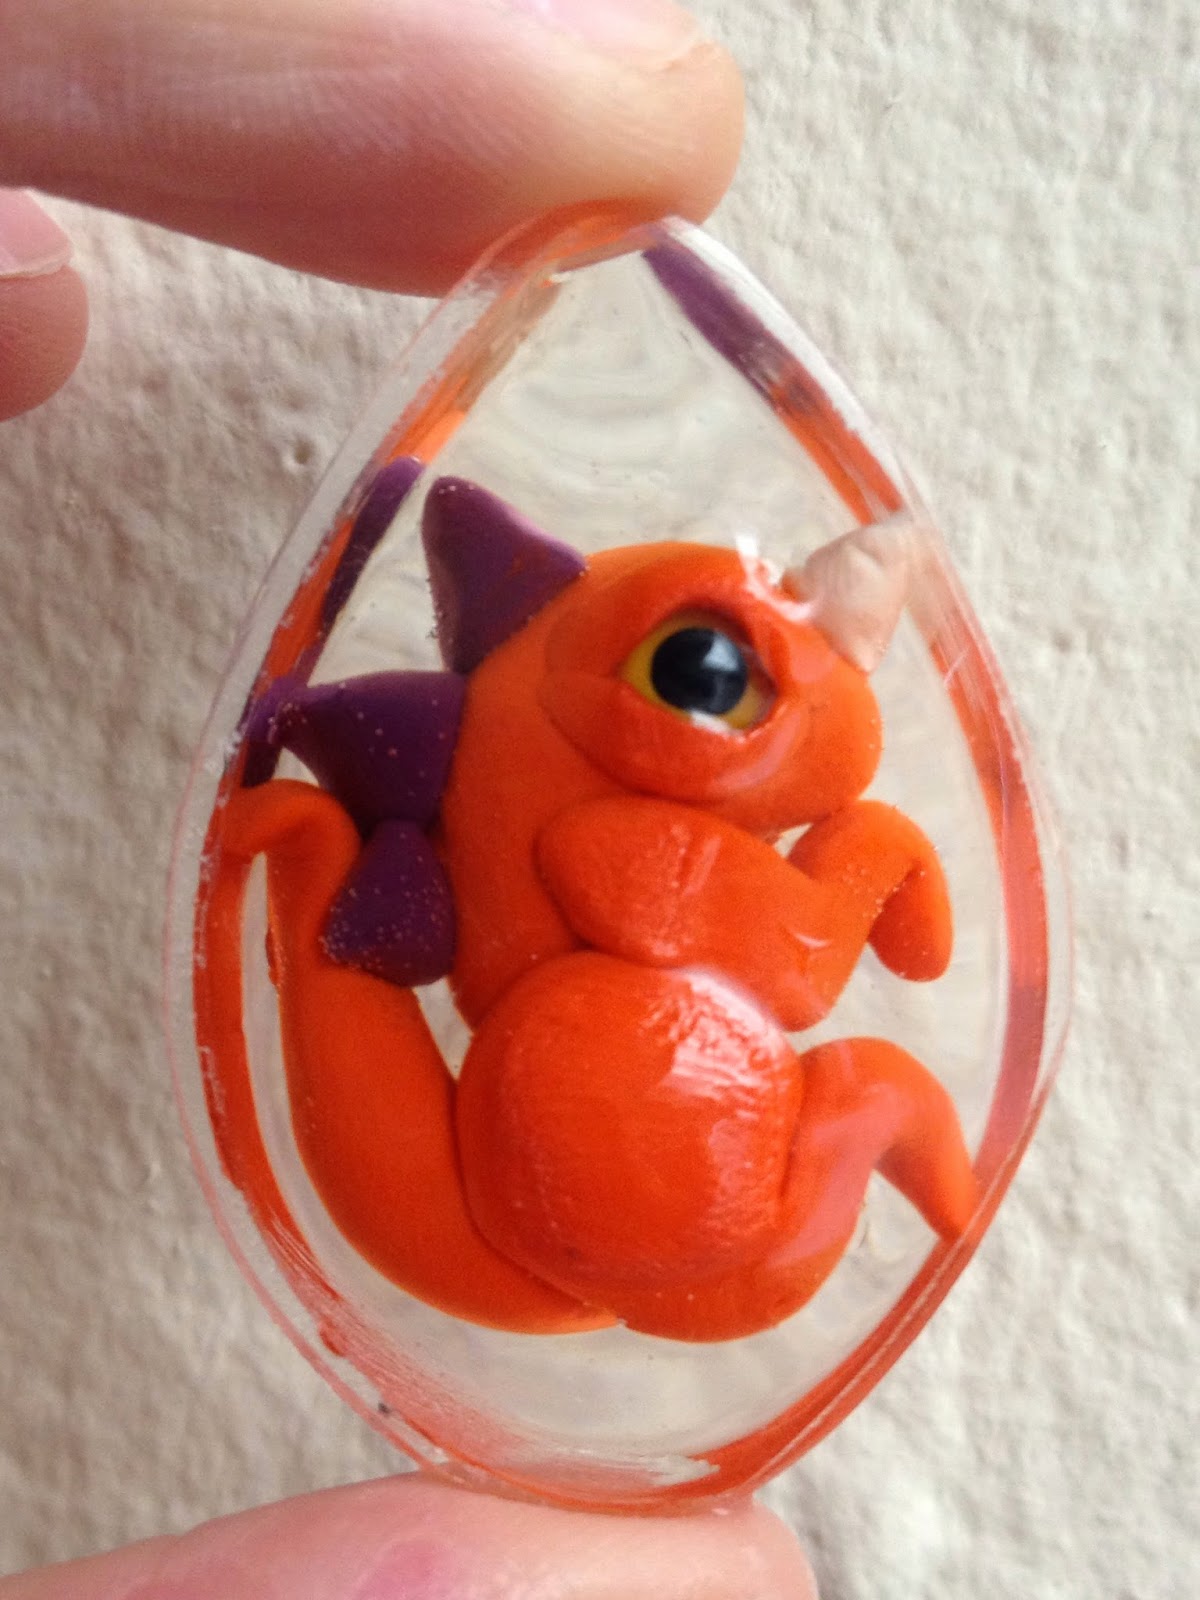 |
| Fat dragon drop. Yes, he’s cute (I think) but he protrudes too much from the surface and looks generally squashed. |
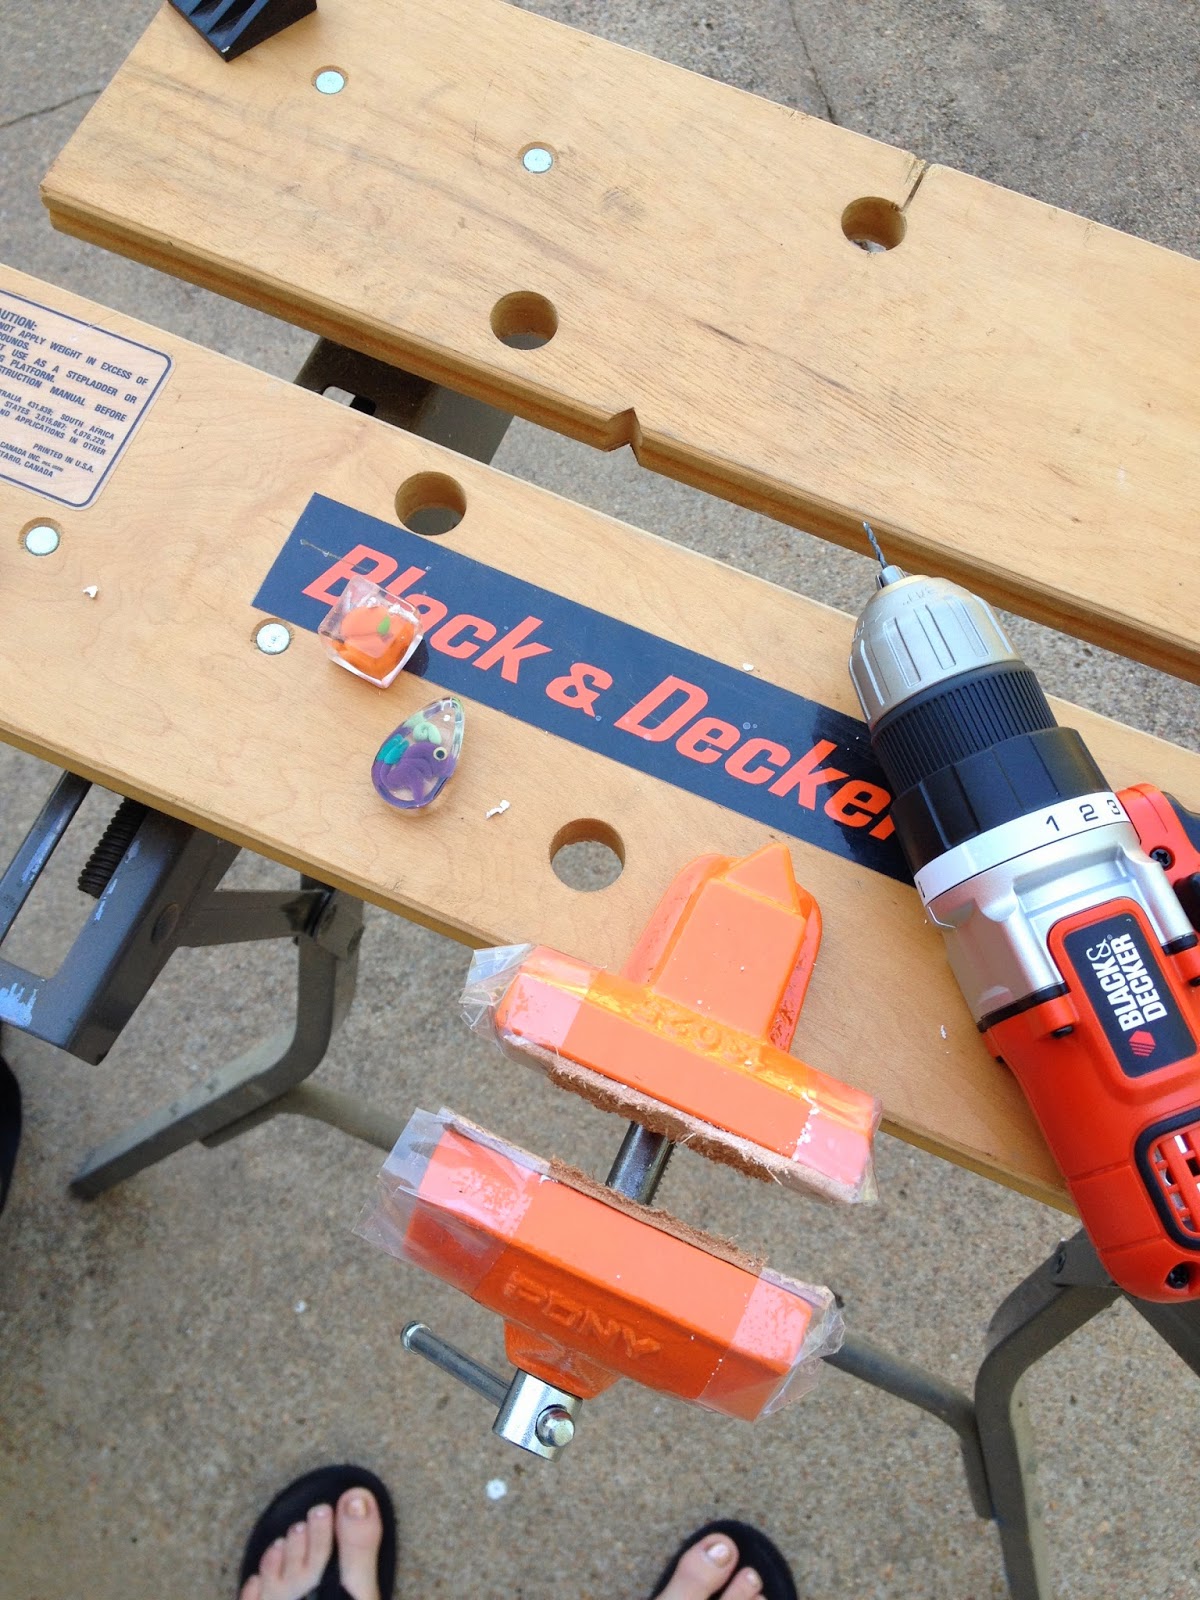 |
| I read online guides which say you can and should make holes in your resin pendants by drilling. I was not successful at this. |
 |
| Two problems, mainly. 1) No hole I drilled, regardless of location, would easily accept a jump ring. 2) In order to drill a pendant you have to put it in a vise. Even with leather padding, tightening the vise enough to hold the pendant firmly ended up squishing it (you can see the clay protruding from the surface of this freeze peach. Not supposed to happen). |
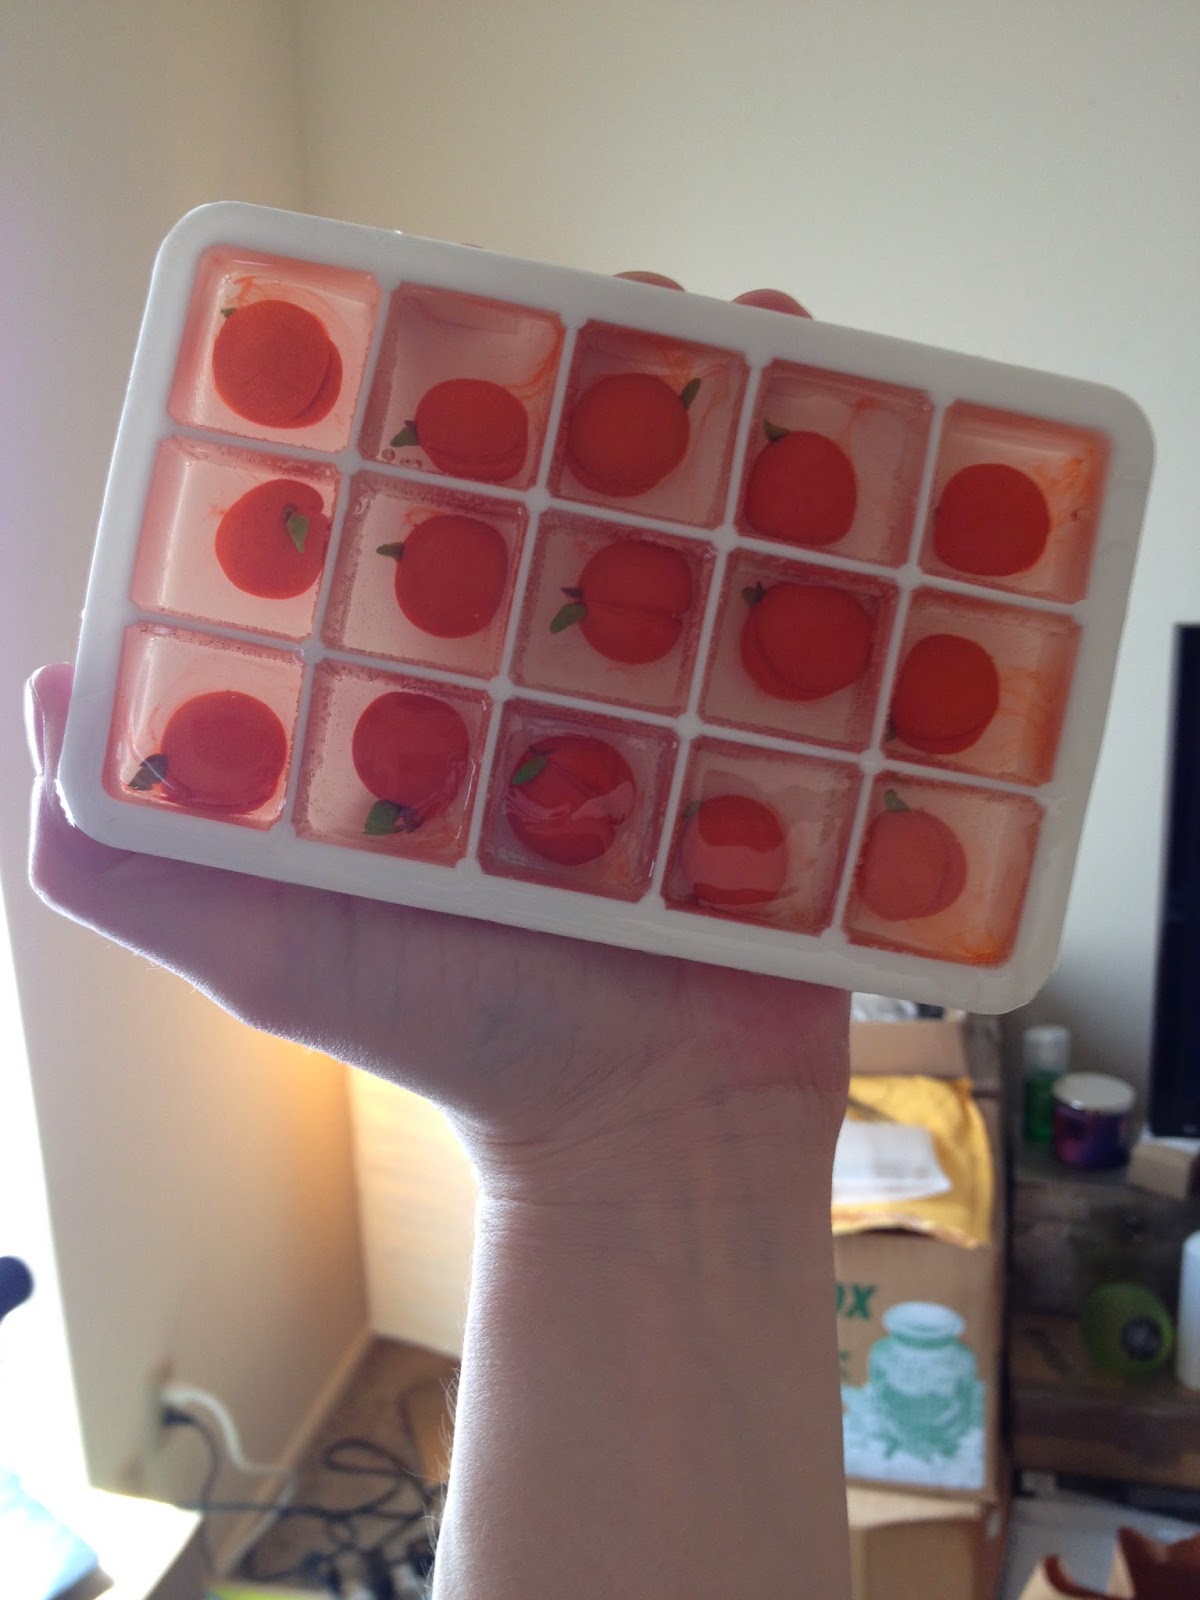 |
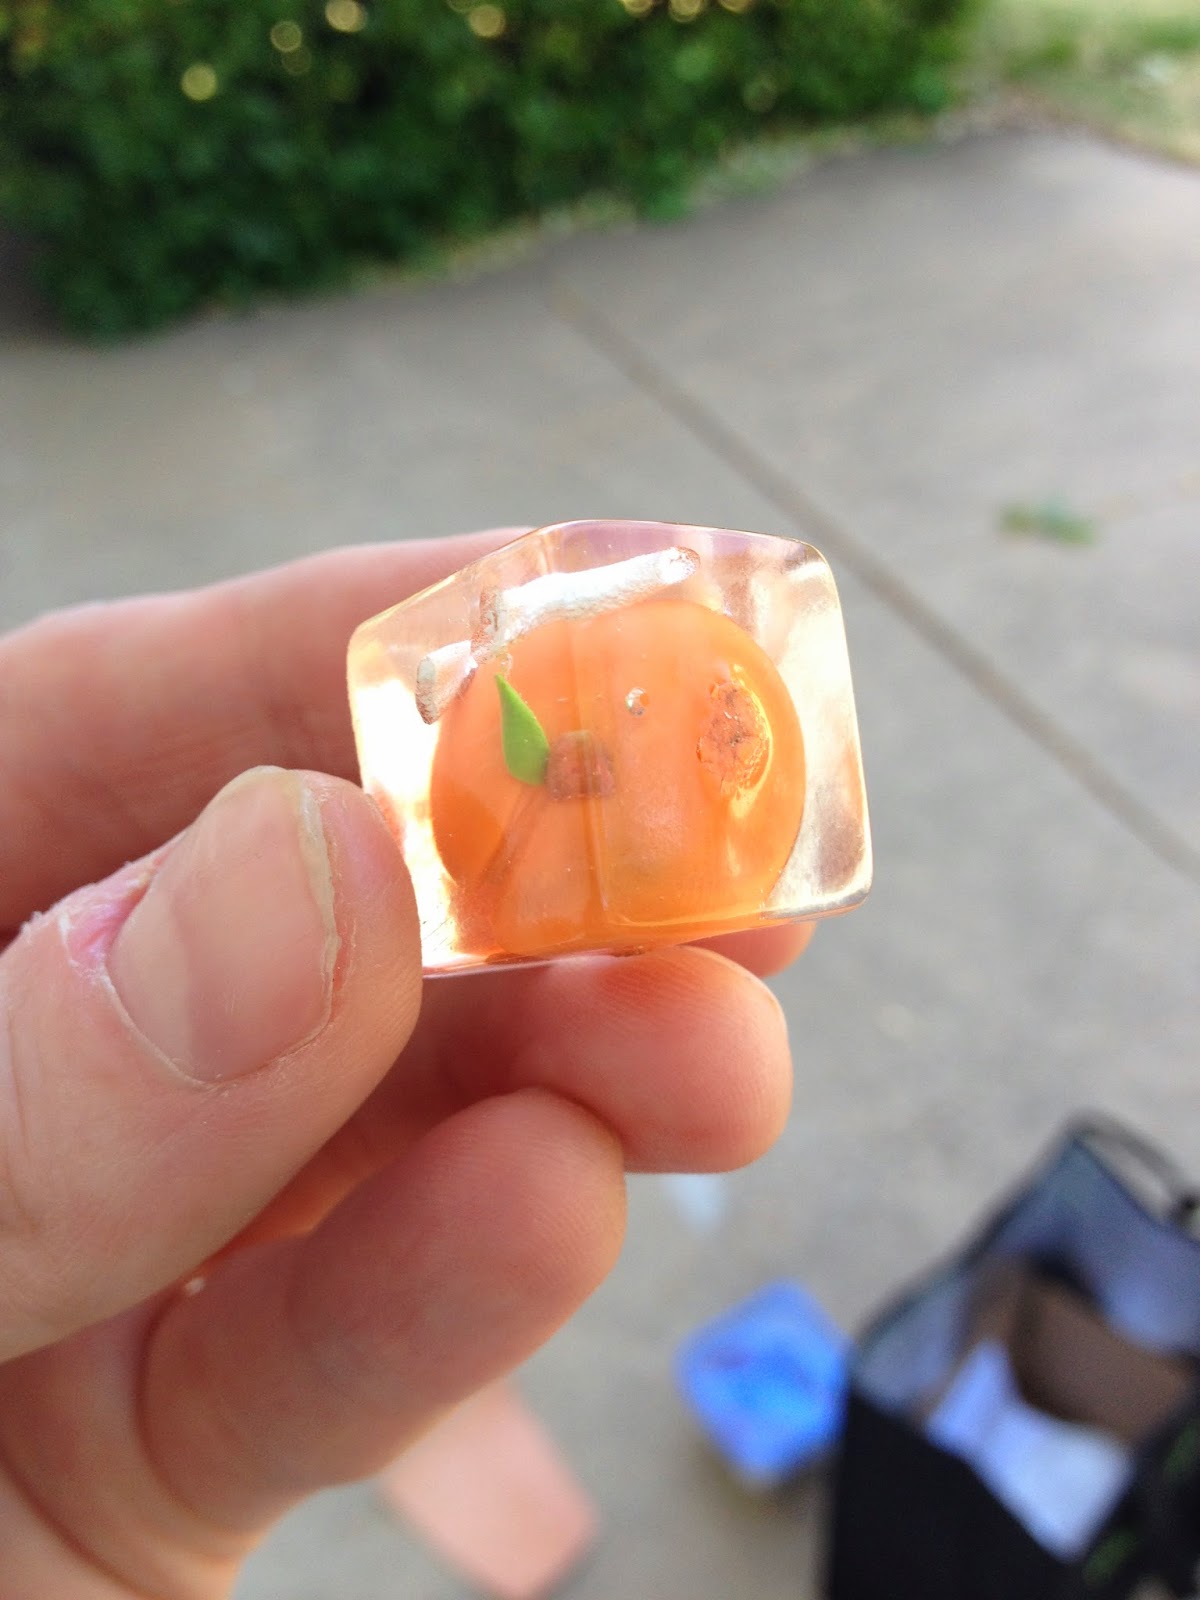
| I found a silicone tray which would make specialty tiny ice cubes, one inch square. I made a tray of freeze peaches. When they cured they formed a hardened brick, which I then was able to snap apart and peel out the individual peaches. The color runs a bit in some of them, creating a peach colored “wave” inside the cube. |
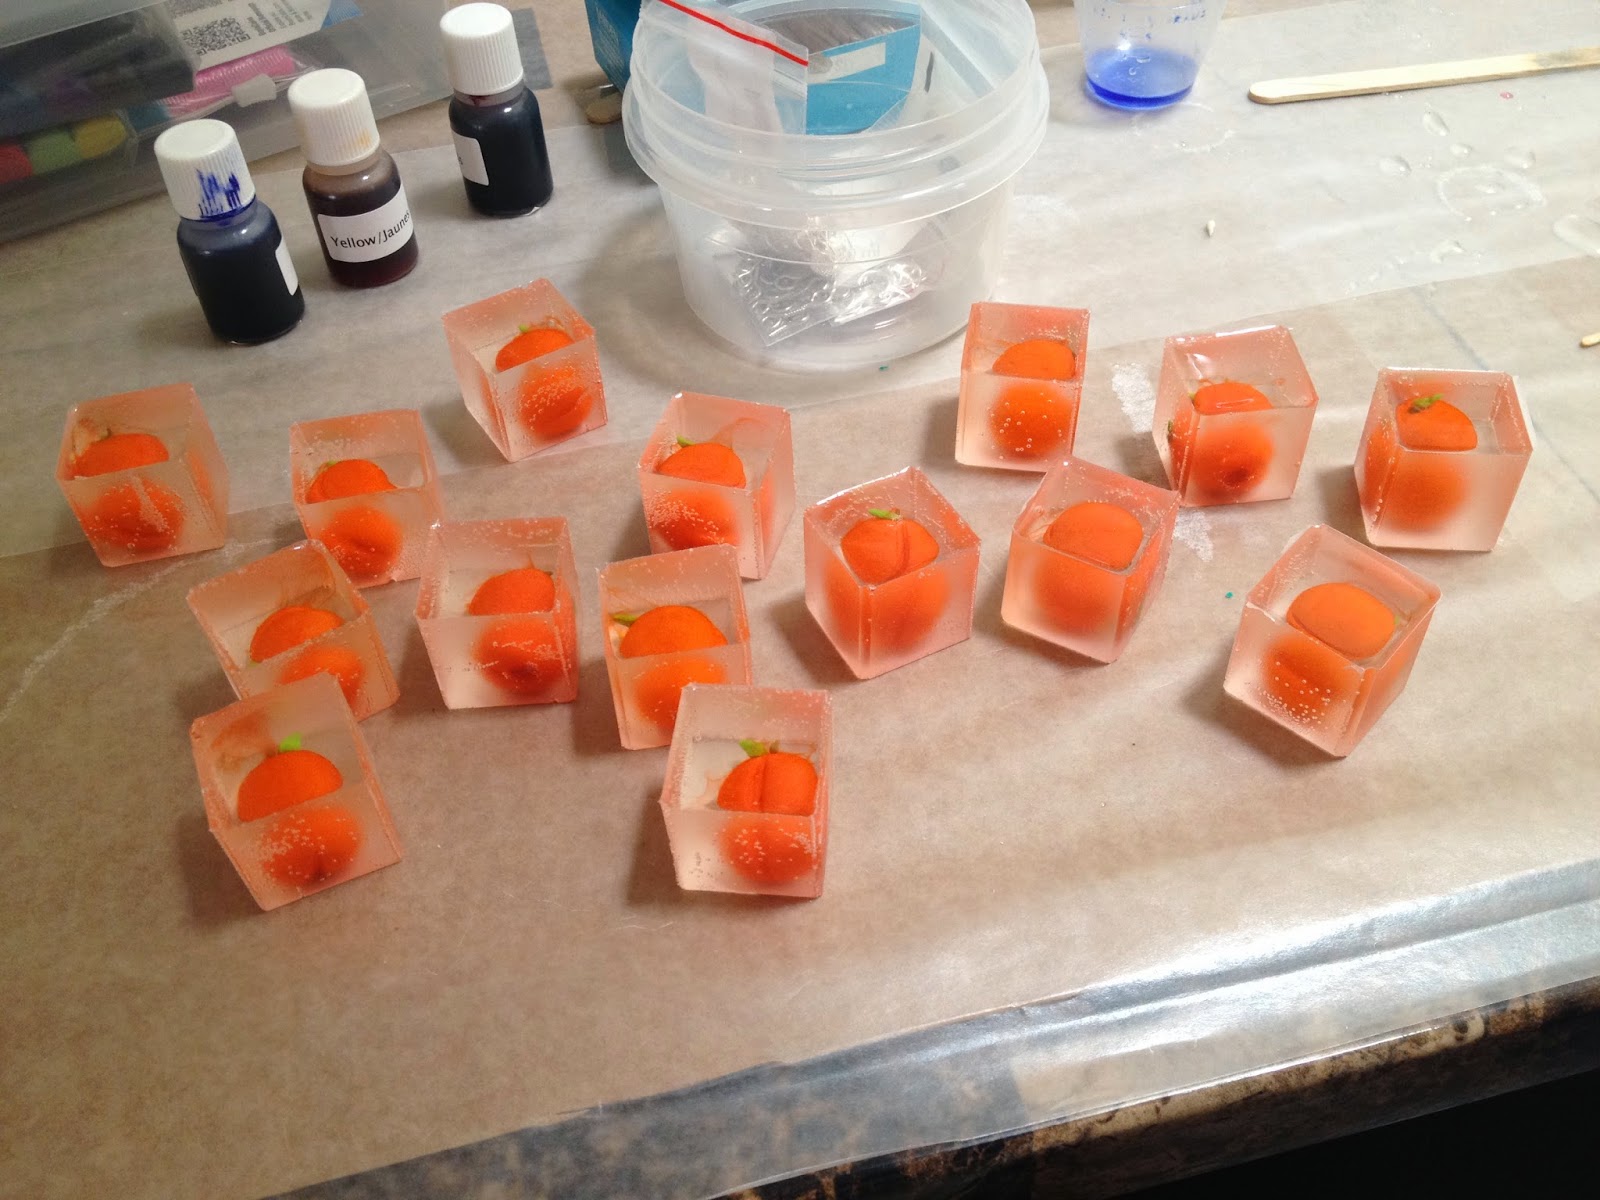 |
| The freeze peaches from the ice tray. They have a semi-translucent “frost” on all sides except the front which apparently is an effect of the tray. |
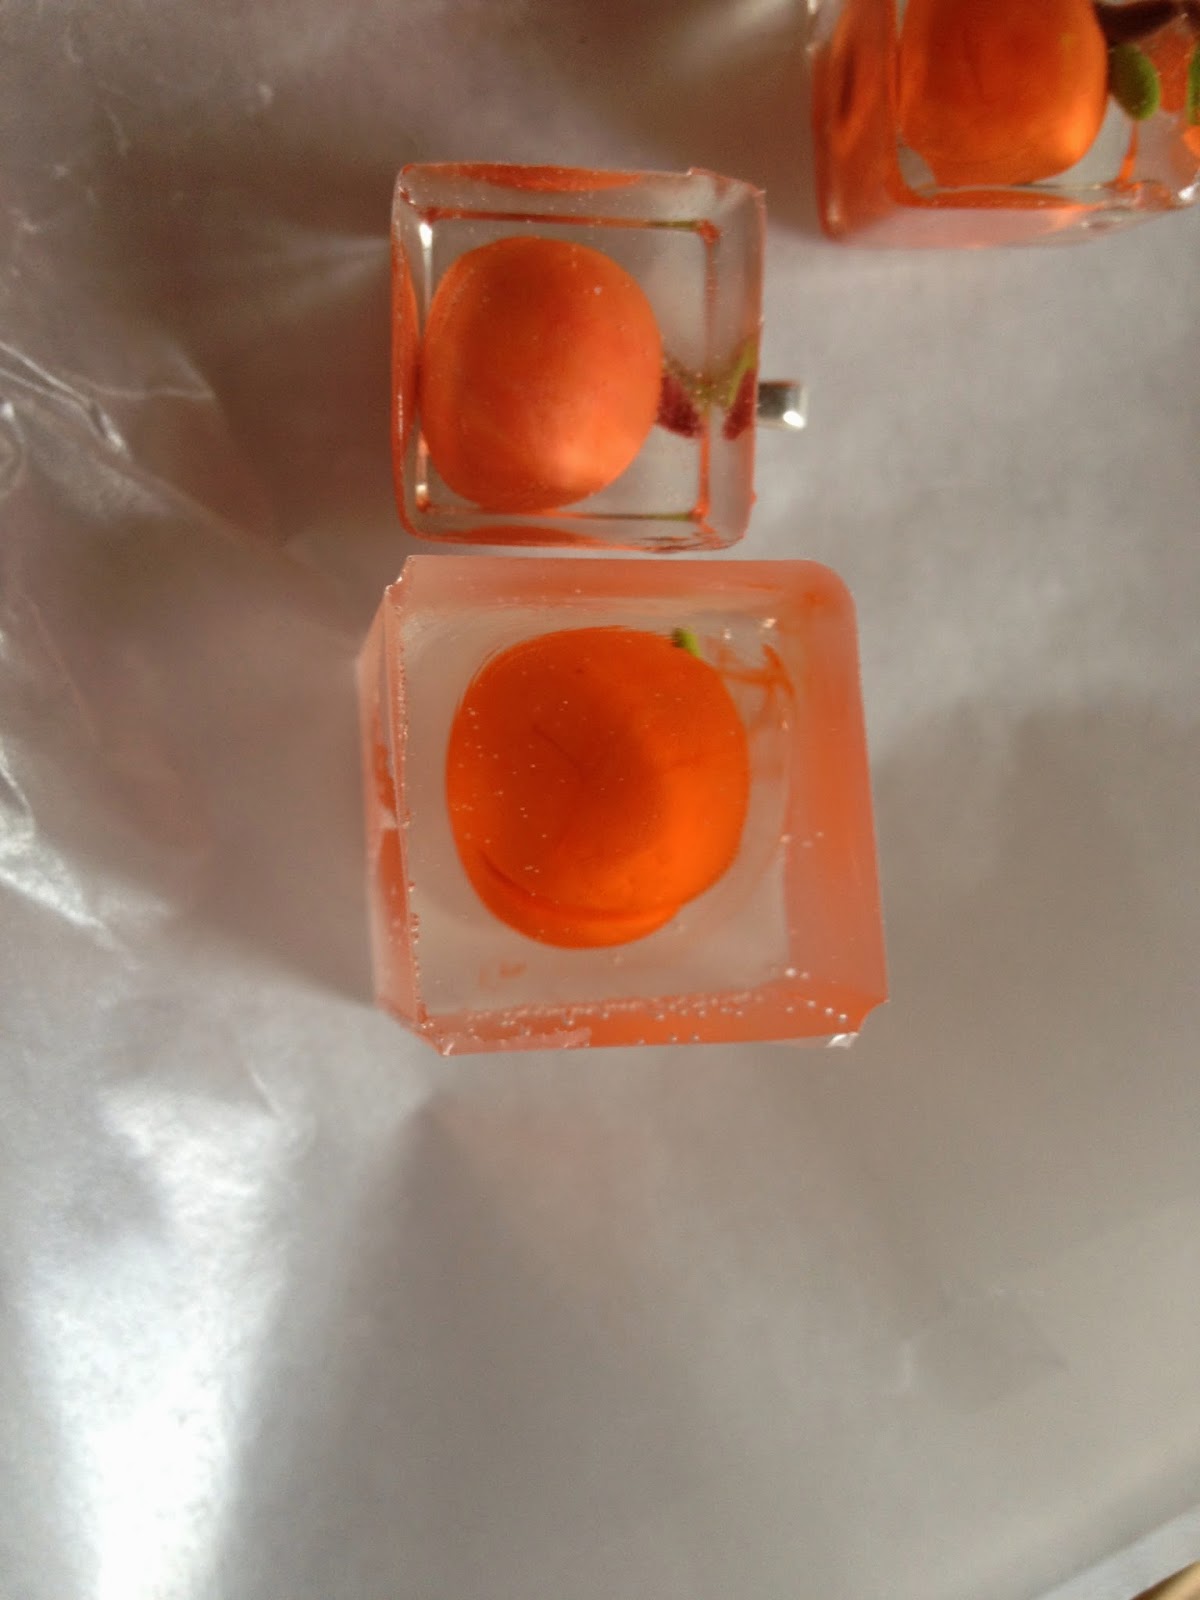 |
| A size comparison of a freeze peach made from the single silicone mold I have (one peach every 24 hours, if I make one that often) and a frosty freeze peach from the silicone tray (which can make 15 freeze peaches every 24 hours). |
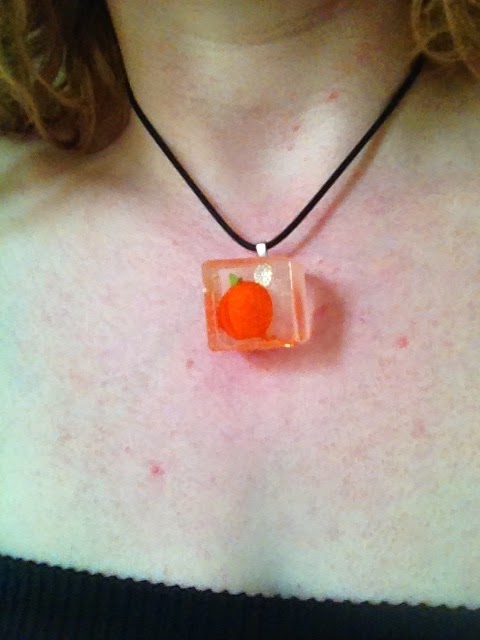 |
| I ended up getting silver-colored metal alloy bails to attach the freeze peaches to a necklace instead. Here’s one of the frosty freeze peaches on a 17″ rubber cord around my neck. |
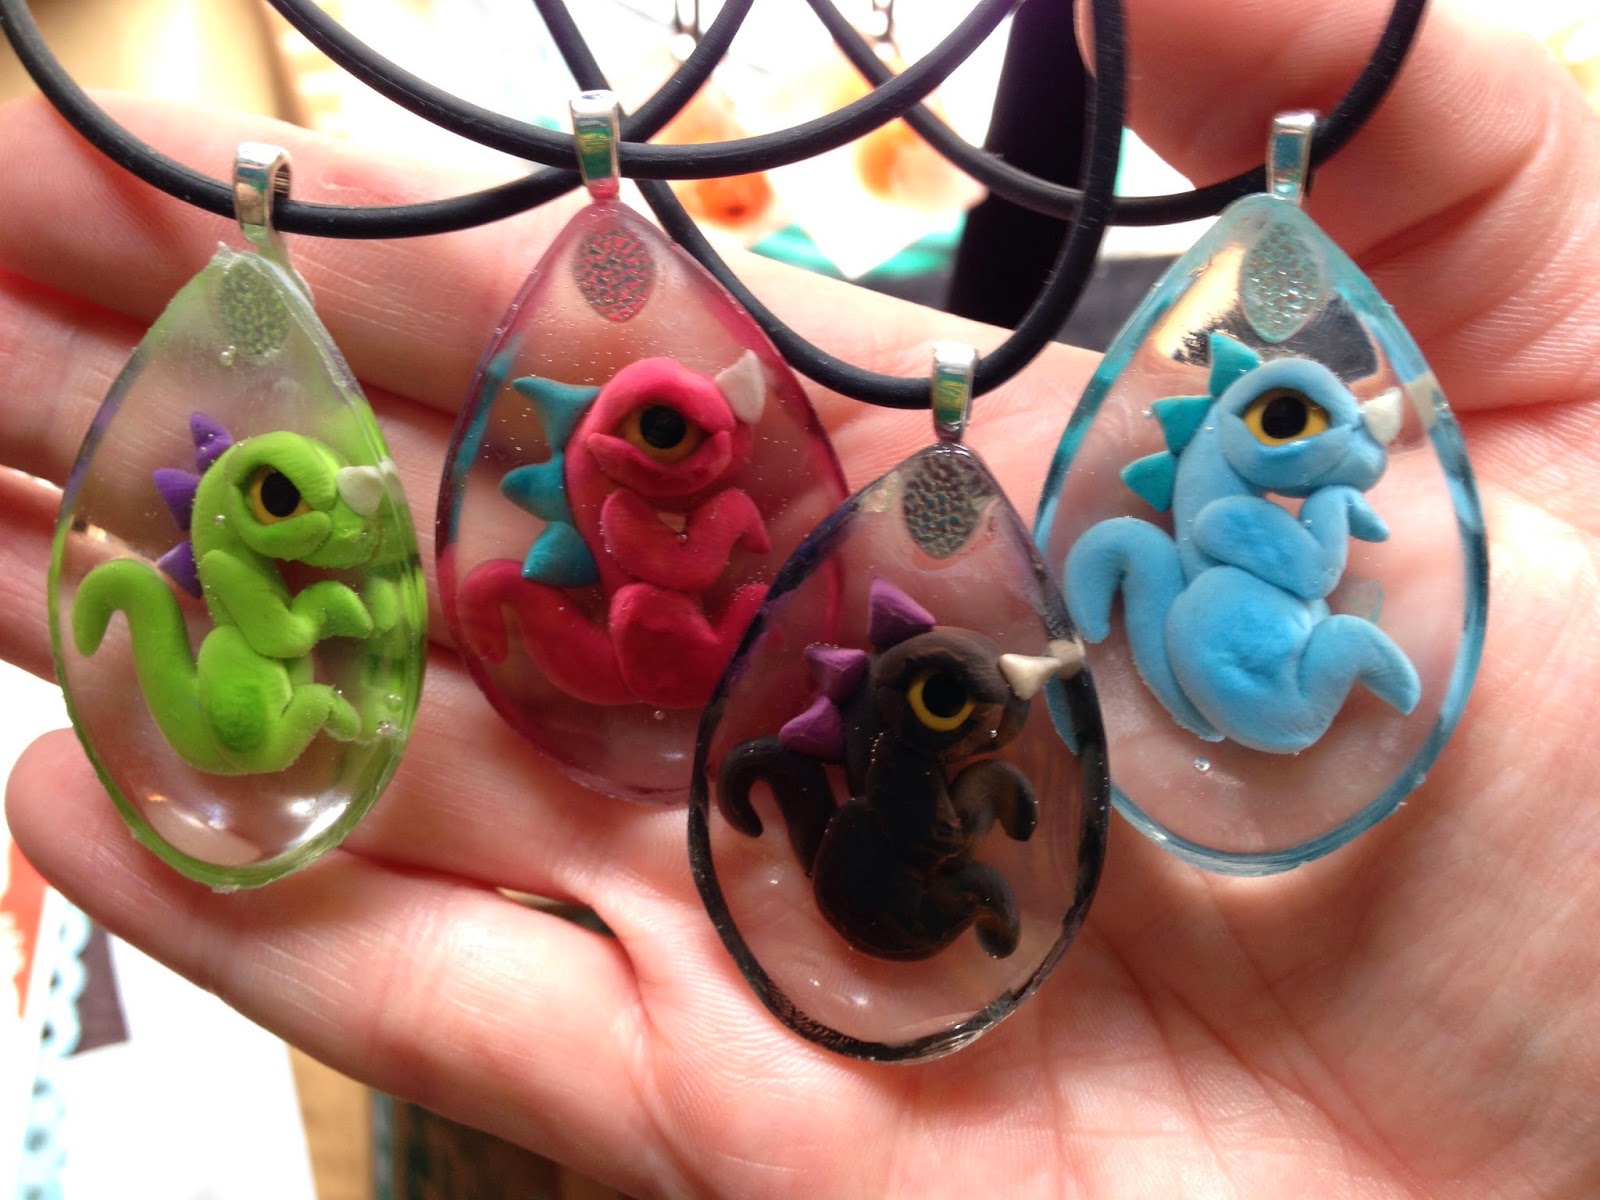 |
| Dragon drops. Also using the same kind of bail and the same rubber cord. I got some silicone molding putty and I’m making some new molds today so that I can produce these faster. I’m happy with these, but need to practice so I can get them consistently the same size and depth, although it’s neat that they’re all different and have their own character. |
In case you’re wondering….
Do I have an Etsy store? Yes.
Am I selling anything on it? Not just yet. I’m not quite ready. Hopefully soon.